Saturday, October 22, 2011

Today's Bake; Egg Tarts & Brownies


I took leave today cause I was feeling tired and lazy. Cause I had been spending a lot of time reading a harry potter fan fic (very good fic indeed) and thought I might be able to take the day off, reading more fic. But i ended up baking egg tarts and brownies since this morning. What the hell! Hahaha. (recipes can be found here and here!)


Mama asked me why did I always bake during my off days. I told her that i would feel weird if I don't bake something. It's true. It's as much a part of my life as breathing and sleeping. All right, maybe i exaggerated a bit there but that's how much I love baking. :D

Today's bake is nothing new. I felt like eating some egg tarts and the last time I made a batch was probably sometime during the beginning of the year or something.

And for the brownies? It is a request from my dear old friend, Jacelyn. She insisted on paying for it and being my first customer but I guess I will try and see if I can convince her not to pay. hmm.... Anyhow, as I was mixing up my brownies this afternoon, I can feel that this brownies is gonna be just perfect. I don't know how I know but I just know. :D I also added 2 tbsp of kahlua.

Anyway, I have to go shower and off to meet the ladies! Hope they like my bake~

Have a great weekend everyone!


Friday, October 21, 2011

Chocolate-Chocolate Chunk Muffins


For the past months, I had been using Nigella's chocolate muffins recipe whenever i anyone request for chocolate muffins. Seems that some of my friends love it although to be honest, the chocolate doesn't feel enough for me. So this one, this recipe posted by Browneyedbaker had long since caught my eyes. The result is not disappointing. They are very chocolatey. The only thing to be blame was that I reduce the amount of sugar to 1/2 cup, therefore resulting in a less sweet muffin. I certainly would not reduce the sugar again the next time I make this. And yes, I will surely make this again and again and again and...


Well, let's just get on with the recipe, shall we?

Recipe is as below (copy from Ms Browneyedbaker -please do visit her lovely site)

Makes 12 muffins

Ingredients:
¾ stick (6 tablespoons) unsalted butter
4 ounces bittersweet chocolate, coarsely chopped
2 cups all-purpose flour
2/3 cup granulated sugar
1/3 cup unsweetened cocoa powder, sifted
1 tablespoon baking powder
½ teaspoon baking soda
½ teaspoon salt
1¼ cups buttermilk
1 large egg
1 teaspoon pure vanilla extract

Directions:
1. Center a rack in the oven and preheat the oven to 375 degrees F. Butter or spray the 12 molds in a regular-size muffin pan or fit with paper muffin cups. Place the muffin pan on a baking sheet.

2. Melt the butter and half the chopped chocolate together in a bowl over a saucepan of simmering water. Remove from the heat.

3. In a large bowl, whisk together the flour, sugar, cocoa, baking powder, baking soda and salt. In a large glass measuring cup or another bowl, whisk the buttermilk, egg and vanilla extract together until well combined. Pour the liquid ingredients and the melted butter and chocolate over the dry ingredients and, with the whisk or a rubber spatula, gently but quickly stir to blend. Do not overmix the batter. Stir in the remaining chopped chocolate. Divide the batter evenly among the muffin cups.

4. Bake for about 20 minutes, or until a thin knife inserted into the center of the muffins comes out clean. Transfer the pan to a rack and cool for 5 minutes before carefully removing each muffin from its mold.


Mixed dry ingredients together

Whisk the wet ingredients

Pour the wet ingredients + melted butter + melted chocolate into the big bowl of dry ingredients

Fold in chopped chocolates

Into the muffin cup they go~


My notes:
1. Her recipe calls for 2/3 cup of sugar. I used 1/2 cup of brown sugar instead. I would advise, don't reduce the sugar!!!


2. I think adding some chocolate chips would make the muffins even more heavenly!!


3. I use 190 degrees C.


4. I do not have buttermilk so i used 1 tbsp of white vinegar plus milk to make a cup. Let is stand for about 5 to 10 mins before using.

Saturday, September 10, 2011

Happy Birthday to Sin Cheah

A birthday cake for Sin Cheah :D

We were lazy and used can whipped cream instead so.... the result did seem a bit sloppy. Pei Hwan sponsored the fruits and her mother help with the arrangements.

Japanese Cotton cheesecake [original recipe]


After the first attempt at the cheesecake, I decided to try again, this time with the original recipe. No reduction. The one with the 4 eggs.

Recipe refer to Passionate about Baking, adapted from Alex's Goh recipe.

More familiar with the steps this time, I took some pictures along the way =b


Ingredients:
(A) 160g Cream Cheese, 25g Butter, 120g Milk
(B) 40g Flour, 30g Cornflour
(C) 4 Egg yolks
(D) 4 Egg whites, 1/8tsp Cream of Tartar, 100g Sugar, pinch of Salt

Method:
1. Grease and line the bottom of two 20-cm oval pans. Wrap outside of the pans in foil.
2. Place (A) in mixing bowl and stir over double-boiler until thick. Remove it from double-boiler.
3. Add (B) and mix until well combined. Add (C) and mix until well blended.
4. Whip the egg whites in (D) until foamy. Then add the remaining (D). Continue whipping until soft peaks. Add it into the cheese mixture from step (3).
5. Pour the cheese filling onto the prepared oval pans. Bake in water bath at 160C for 40-45 minutes or until well incorporated.
6. Remove cake from the oven. Remove the cake from the mould immediately. Set aside to cool.

Notes:
1. I reduced the sugar to 90g.

2. I sieved the mixture after step 3.

3. I used 150C and must have probably took at least 2 hours to bake =_= I am not sure what I did wrong. It was still moist whenever i tested the cake.

4. I cover the top of my cake loosely with an aluminium foil as soon as I saw that the top is golden brown in colour, which is after, about 35 mins.

5. I used hot boiling water for the water bath.
6. I used a 8 inch round cake tin, greased the bottom and side of the cake tin and line paper at the bottom only.

7. For step 6, I used a small spatula to run between the cake and tin, and leave the cake to cool inside the tin.


This egg separator makes life a little easier for separating eggs.

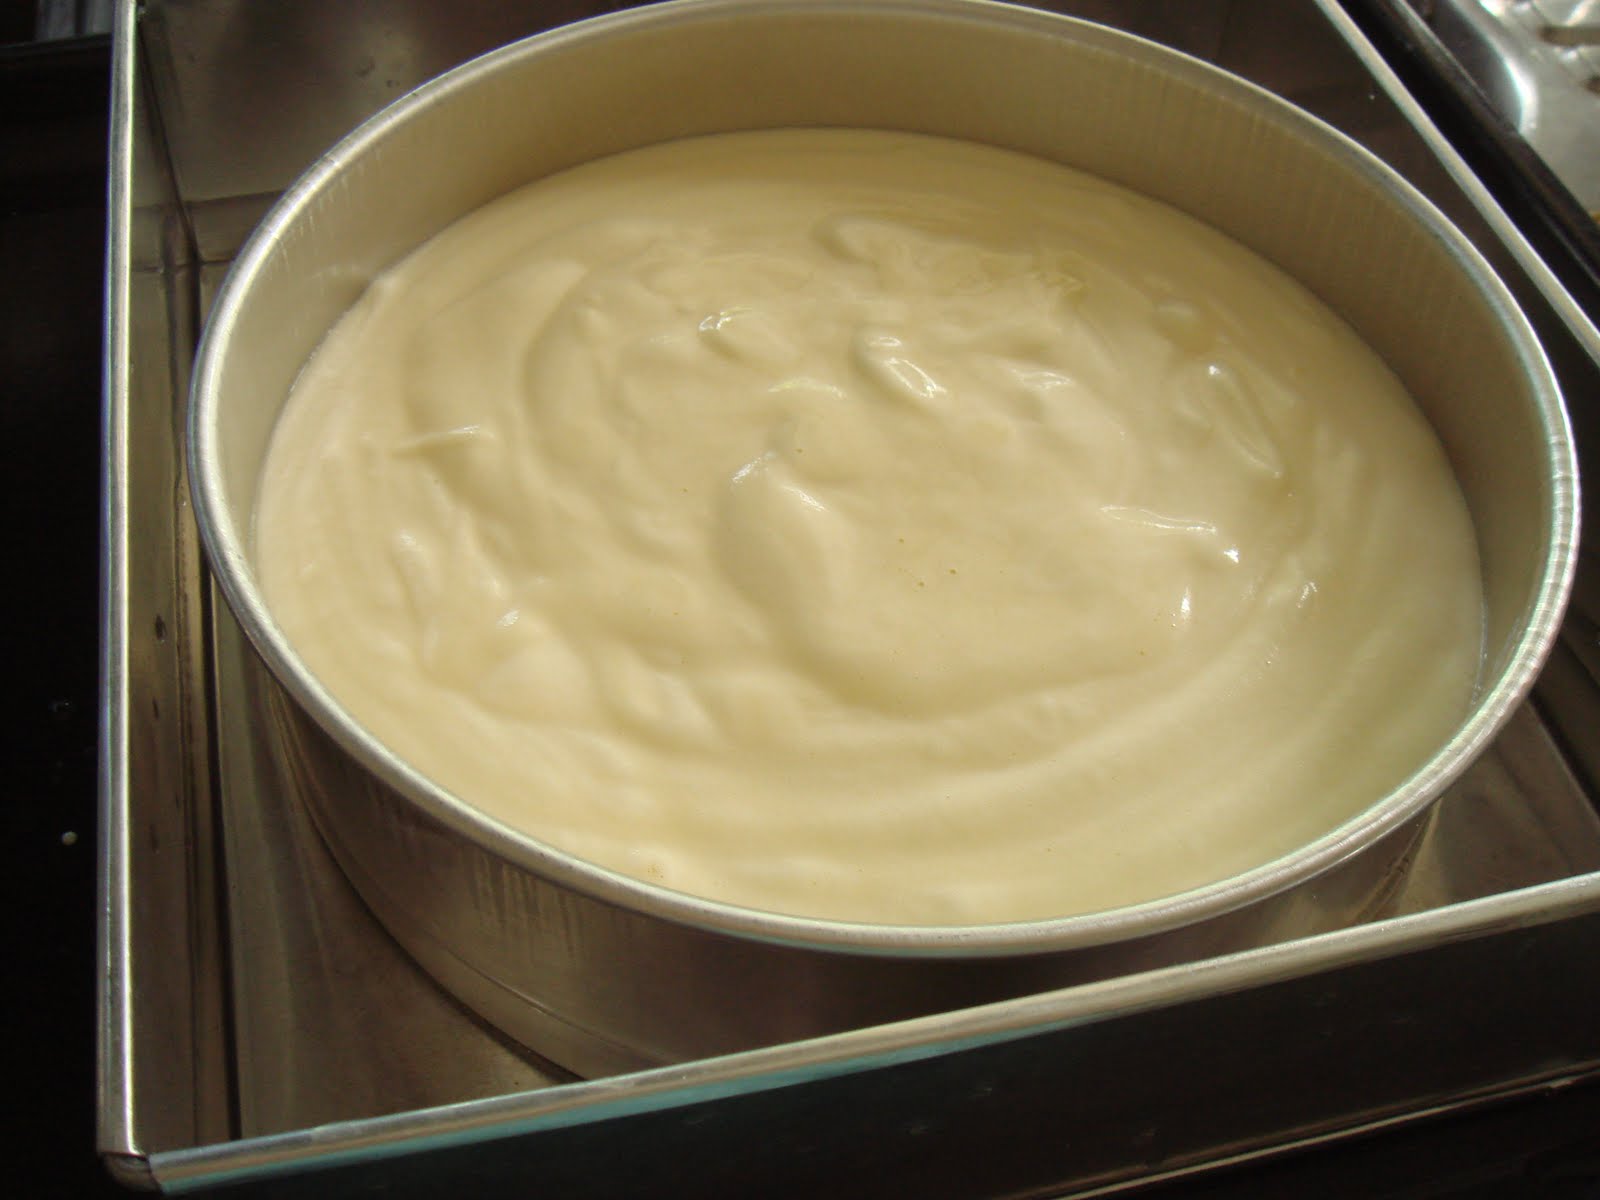
The cream cheese mixture before sieved.

sieved them nice and slow =b

see how they become smoother now?


Beating egg white till soft peak

Poured them into my 8 inch cake tin


Ah, yes. The sponge is definitely taller than first attempt. :D

Japanese cotton cheesecake (75% of original recipe)


I had never made any sponge related cake before cause I have this phobia. Okay, maybe phobia is a little too much. But I am really really scared that my cake would collapse, too dense or dry or... that's why I had always made muffin. Cause they are easy.

My friend encouraged me to try. My mom as well, she told me that she used to make countless failed butter cake until she was eventually satisfied. Oh, she never follow recipe and only estimate by eyes.

So why started with Cotton cheesecake, you might ask? Well, I really want to make a dessert that my family would like. My parents are not big fan of chocolate and I remembered my younger brother told me he prefer light cheesecake compared to those heavier type.

I chose this recipe from wendyywy, who adapted from Alex Goh. Her cakes look really pretty and told. I also refer to another site from The Little Teochew which I find is very very helpful especially for a beginner like me. She offers several tips and tricks. Really really really helpful!

Baked this cake nearly 2 weeks ago but was too busy to post.

Wendy's recipe only calls for 3 eggs. She reduced the ingredients slightly for her 8 inch round cake tin. I only follow her cake recipe and did not do any topping like she did. Please visit her page for her fruit topping's instructions.

[Recipe below copied from Wendy, please visit her site]

Ingredients:
125gm cream cheese

90ml milk
15gm butter

30gm flour
24gm cornstarch
3 egg yolks

3 egg whites
pinch of salt
1/8 tsp cream of tartar
75gm sugar

Methods:
1. In a heavy saucepan, cook cream cheese, milk and butter until thick and smooth. Set aside.

2. Preheat oven at 160C. Boil some water.

3. After the cheese mixture has turned warm and mix in both flours. Stir with a whisk until smooth.

4. Put egg yolks into the cheese mixture and stir until well combined.

5. In another clean bowl, beat egg whites until frothy. Put in cream of tartar and beat until soft peaks, add in sugar gradually and beat until stiff (soft droopy peak that will hold its form).

6. Fold 1/4 of egg whites into cheese mixture, and then another 1/4 of the egg whites.

7. Pour the cheese mixture into the remaining egg whites and fold.

8. Pour batter into a lined pan (you can just line the base and grease the sides, it's not a must to line the sides as well. Springform or regular pan will be fine, but spring form's base must be wrapped.)

9. Place cake pan into a slightly bigger, shallower pan. Fill the bigger pan with boiling water and put in oven to bake at 150C for 45 minutes.

10. Unmould cake immediately upon removal from oven, if not, the cake will shrink a lot. (If you're using a regular pan you can release the sides by running a knife between the cake and pan, and leave the cake in the pan to cool down).


My note:
1. I reduced sugar to 60g which is just right for my family's standard. They don't like it too sweet.
2. I follow Wendy's instruction all the way. Except I sieved the mixture just as Little Teochew advised after step 4 above.
3. I used double boiler method to melt my butter, cheese and mixture in step 1.
4. I was really slow and preparation alone took me one and a half hour! Haha

The outcome of my cake is quite short. Slightly over 1 inches only. For a first timer, I think I might have done something wrong somewhere. I am not sure. But the texture and taste are great. They are soft and cottony.
My family love it. So was my brother, who is very picky at food. I cut out 2 small pieces for my fren, Hwan and she told me she loved it! :)

Such great joy when someone tell you that he/she loves your desserts.


Sunday, August 07, 2011

Cranberry Orange Muffins


I bought a packet of dried cranberries last weekend (cause I love cranberries) and thought I could make good use of them for baking. I was initially planning to bake cookies but I woke up at almost noon today. And I was too lazy to take out my electric beater. So I settle for muffins. I had been eye-ing this recipe from Pam for a while now. And I finally did it. The muffin was soft and moist, and come out so orange-y. Haha. My parents think it's a bit too sweet for them but despite that, they asked for seconds.


Here goes the recipe. Adapted from Pam, with a slight changes made by me. Just very very slight.

Ingredients:
2 cups of flour
1 cup of sugar (I used 3/4 cup of sugar - will be using only 1/2 cup next time)
1 1/2 tsp baking powder
1 tsp salt
1/2 tsp baking soda
1 tbsp orange rind
3/4 cup of fresh orange juice
1 cup of dried cranberries
1/4 cup of canola
1 large egg
Coarse raw sugar

Method:
Preheat the oven to 400 degrees (200 degrees celcius). Coat a muffin tin with cooking spray or you can just use muffin cups like I do.

Place the dried cranberries and the freshly squeezed orange juice in a small sauce pan and heat over medium heat for 5 minutes. This helps plump up the dried cranberries.

Combine the flour, sugar, baking powder, salt, baking soda, and orange rind together until well mixed. In a separate bowl, add the orange juice, cranberries, canola oil, and egg and mix together. Pour this mixture into the dry mixture and stir until combined.

Pour the mixture evenly into the prepared muffin tin. Sprinkle a bit of course raw sugar on each muffin top. Place into the oven and bake for 15 minutes or until a tester inserted in the center comes out clean. Cool on a rack for a few minutes. Enjoy.

My own notes:
I used the whole of 3/4 cup of fresh orange juice to heat up the dried cranberries. After that, I have about 1/8 cup of juice left in the pan (ya I measured them out). I wasn't sure whether I am suppose to allocate extra juice for the batter. I didn't add additional juice into the wet mixture until I pour the wet mixture into the dry mixture.

As expected, my batter was very very dry. So I added another 1/2 cup of orange juice + 1/8 juice (to top up to the same amount as stated in the recipe). And my muffin come out just great!

My baking time was 200 degrees c for 15 mins plus another 15 mins for 180 degrees c. (cause the top was already quite brown)


Thursday, July 07, 2011

Chocolate Chunk Cookies


First time trying out this type of recipe, i.e preparing the dough in advance, freeze them and chopped them into pieces.

I especially love using this recipe because I do not need to take out my cake mixer. Ya, I know I am lazy =b always looking for the easiest recipe. My only problem was that I really fail big times in my cutting skill. I was having a little problem cutting through those thick chocolate chunks in the dough and some squares just didn't... make it =A= Look at the picture above, they look so out of shape *orz

The texture of the cookies taste shortbread-ish and again, I really really love the taste of those big chocolate pieces melting in my mouth after I took a bite. It was so addictive I alone finished a whole container. When i was chopping them, I kept thinking, "I am never gonna use chocolate chunks again" But then, I definitely will, especially after I got a taste of them.

I remember waking up at 6 a.m. on a Saturday to bake this. Brought some to the office and was really glad they like it. There I go being long winded again, I am sure you are anxious to check out the recipe.


I came across this recipe in a chinese forum.
Please refer to the link above for a step by step picture instructions =D

Ingredients:
120g butter (room temperature)
60g icing sugar
1/8 tsp salt
30g egg (about half an egg)
1/8 tsp vanilla
180g flour, sieved
45g chocolate (chopped into pieces) or any other chocolate

Decor (optional):
water
sugar/brown sugar

Method:
1. Use a spatula and and beat the room temperature butter until its soft.
2. Add icing sugar and salt and mixed into the butter until well incorporated.
3. Add egg and mixed well. Then add the vanilla
4. Fold in sieved flour and after that threw in the chocolate chunks!
5. Rolled the dough into rectangle log and wrapped them in cling film. Then into the freezer these log go!~ (I freeze overnight)
6. When it's time to bake, preheat the oven with 180 degree celcius.
7. Took the dough out, brush the surface of the dough lightly with water then rolled them in plate of sugar. This step is optional. I personally like the crunchy texture though.
8. Cut the dough into about 6mm in thickness
9. Bake for about 15 mins

Enjoy~~

*doubling the recipe made 2 small containers

*lalalal~

Sunday, January 02, 2011

Strawberry Cream Cheese Muffins


I love making muffins because I can easily mix up a batch without taking out my electronic beater. For muffins, dry ingredients are often prepared separately from the wet ingredients. Then the prepared wet ingredients are folded into the dry ingredients.

During the folding process, do make sure that you don't over fold them. Mixture is usually lumpy but that is just fine for muffin.

So, one day, I told Shu Vun that I wanted to bake something different. Not the usual chocolate cake, cheese cake but something different! She recommended the Strawberry Cream Cheese muffins. This muffin give you surprise inside. =D

I found several links on the web and i chose to follow this and this. The latter link shows steps by steps pictures. This recipe is very well received by all my friends and family. They just couldn't get enough of it!

However, i changed the amount of baking powder used because my muffins didn't seem to rise much on the first tries. Taste wise is good. Really good. But i prefer my muffin to be taller. I had made this countless times and it always comes out good, soft and nice!

The cream cheese filling in the middle often cause people to think that the muffin is uncook so be sure to assure your guinea pig, ahem i mean, your friends that they are just cream cheese. Well, that usually happen if you consume the muffin right out of the oven.

Here's the recipe:-

This recipe make about 12 muffins

Dry ingredients:-
2 cups all purpose flour
3/4 cups of granulated sugar
2 1/2 tsp baking powder
1/2 tsp salt

wet ingredients:-
1 cup milk
1/2 cup/113g unsalted butter, melted
1 tsp vanilla extract
2 large eggs (at room temperature)

1 cup fresh strawberries (chopped into pieces)

Cream cheese mixture:
4 oz/113g cream cheese (at room temperature)
1/3 cup granulated sugar
1 tbsp vanilla extract

Methods:-

1. In a large mixing bowl, mix together the dry ingredients and set aside.
2. In another bowl, whisk the wet ingredients together until well incorporated.
3. Make a well in centre of the dry ingredients and pour in the wet ingredients.
4. Fold them until just combined. Mixture may appear to be lumpy but it's fine. Do not overmix
5. Spoon the batter into prepared muffin cases or tin. Fill each cup barely half full only.
6. Scatter a few strawberry pieces into each one.
7. Top the strawberries with about a tablespoon of the cream cheese mixture.
8. On top of that, add on another 1 or 2 tablespoon of the muffin batter.
9. And on top again, press a few strawberry pieces to the batter
10. Bake for about 25 mins or until top is brown in preheated oven of 180 degree celcius

Enjoy this wonderful recipe. =D

Something I think I should mentioned here, hope it's not too late
Note:
1. The batter should be watery
2. If you want to test the muffin with skewer for doneness, remember to poke the side of the cake. If you poke through the middle, the cream cheese section would be forever moist!


Mr Haines' Chocolate Cake

Mr Haines was my Combined science teacher back in year 1997 from STPRI. Our school love to celebrate Teacher's day by holding the day off and having each class organised their own party. Then each teacher would visit each classes and sample the dishes brought by the students.

So, My Haines @ our homeroom teacher would bring his special chocolate cake everytime with nice chocolate icing on top. He didn't only bring it during Teacher's day, he would even bring it if we students requested it. I don't remember how it taste like now, after 14 years. but it does bring back a lot of happy memories from back then. I probably try to bake it once some 10 years ago. Haha. I think he went back to New Zealand several years ago. Wonder how he is doing now?

So it was 4.30 p.m., i was halfway watching Kimi ni Todoke when i suddenly feel bored. Then i look for Mr Haines' old recipe and started to scout for ingredients around the house. I didn't have milk so i substitute with chocolate milk. My cocoa powder wasn't from the best brand and my margarine was the Farm Cow brand (which i never really like). But I'm really dying to bake something. So i go ahead with all those ingredients in hand.


Here's the recipe for any of you who would love to try it.

1 cup hot water
4 tbsp cocoa powder
4oz margarine (really, i would prefer using butter)
1/2 cup milk
2 eggs
1 tsp vanilla
1 tsp baking soda
2 cups self raising flour (sifted)
2 cups sugar

Methods:-

1. preheat oven to 180 degrees celcius.
2. Mix together hot water, cocoa and margarine.
3. Add baking soda dissolved in milk, vanilla and eggs into the first step and mix well.
4. Beat in sifted flour and sugar until well combined.
4. Pour into baking pan and bake for about 25 to 30 mins.

Cool and then ice with your own chocolate icing recipe. The cake taste fine without icing of course.

My oven took 40 mins to bake this cake. So each oven's baking time varies. This is a really easy recipe. I didn't even need to take out my electronic beater and just mix everything with my whisk. =D

The result? soft and fluffy. I like!

Sunday, November 28, 2010

Mac n Cheese


I was planning to make carbonara.. but my dad wanted to eat mac and cheese.

My mac and cheese turn out pretty well. The best part was making the cheese sauce. Usually, i would just pour most the milk into the butter-flour mixture and they wouldn't really incorporated well. Ya, i was lazy. But today, i added the milk slowly and mixing the sauce until it's smooth. I was very pleased at how nice the sauce came out. :D

I was careful not to overbake them cause i like the fillings to be creamy. I forgot bout my mac and cheese for a while due to facebook games so a part of them was a bit over browned. Haha!

I added tuna and minced chicken. I think it was good combination.

For recipe, please visit here.

Saturday, August 28, 2010

Egg Tarts


Egg Tarts~~ Weee~
Found this recipe from Ching and Mikko

Definitely a keeper! *thumbs up
This recipes yields around 21 - 22 tarts (standard size)

Ingredients for fillings:
140 g sugar (i used 120g which is ideal for my family cause they don't like sweet)
288g water
4 eggs
80g evaporated milk

Method:
1. Boil the water and stir in the sugar until melted
2. Let cool for about 5 minutes or so then add in beaten eggs and evaporated milk
3. Sieve the mixture for 3 times.
4. Set aside

Ingredients for dough:-
300g plain flour
8g custard powder
8g milk powder
8g sugar
1 egg
200g butter

Methods:-
1. Melt butter in double boiler. Let it cool for a while
2. Mix flour, custard powder, milk powder and sugar together in a bowl until combined
3. Add in beaten eggs and melted butter. Mix until just combined only (with a spoon)
* Do not overmix them
4. Divide dough into balls of 26g each
5. Press dough into tart moulds
6. fill the moulds with egg fillings
7. Bake in preheated oven of 160 degree celcius for about 20 mins or till egg custards are cooked.
8. Let the tarts cool for a while, turn over the tart and lightly knock them out of the mould.

Tips:
1. Baked tarts in lower tray to avoid overbaking the egg custards
2. If the egg custards started to puff up, open the oven door a few inches because the temperature may be a bit too high.

Sunday, July 18, 2010

Oatmeal Almond Muffin


Recipe from Ching

Ingredients

120g butter
200g caster sugar (i reduced to 150g)
1/4 tsp salt
2 eggs
250 ml milk
1tsp vanilla essense
240g self-raising flour (sifted)
40g almond slices
40g Oatmeal (i used nestum)

extra almond slices for topping

Method:
1. Melt butter and sugar in double boiler until melted
2. let cool and add in eggs, milk and vanilla
3. Add in sifted flour, almond and oatmeal and mix lightly
4.. Pour mixture into muffin cups
5. Bake in pre-heated oven 180 degree celcious for about 25 mins

Tuesday, February 23, 2010

Jamie Oliver's Bloomin' Brilliant Brownies

It was quite last minute when i decided to make something to bring to Sharlene's house last Saturday. I only had about 2 hours of preparation and cooking available after arriving home after work. I did not have time to go shopping for ingredients. I ruled out chicken pies because the dough needs time to refrigerate. Cookies are not a good idea because you see cookies everywhere especially during this chinese new year. So what to make? Good thing i have a block of cooking chocolate and butter in my fridge. Shu Vun highly recommended this brownie recipe from Jamie Oliver.

I added a little alcohol in my brownies. I do not have any Tia maria or brandy so i used this lychee wine i have call Kui Fei. There is a slight fruity taste in the brownies which i think is just fine.

I didn't have enough time to take a picture of my brownies. But it was really really chocolatey.
So I will use Shu Vun's brownie pic.


Ingredients
• 250g unsalted butter
• 200g dark Fairtrade chocolate (70% cocoa solids), broken up
• optional: 75g dried sour cherries
• optional: 50g chopped nuts
• 80g cocoa powder, sifted
• 65g plain flour, sifted
• 1 teaspoon baking powder
• 360g caster sugar
• 4 large free-range or organic eggs
• optional: zest of 1 orange
• optional: 250ml crème fraîche

Methods

Preheat your oven to 180°C/350°F/gas 4. Line a 25cm square baking tin with greaseproof paper. In a large bowl over some simmering water, melt the butter and the chocolate and mix until smooth. Add the cherries and nuts, if you’re using them, and stir together. In a separate bowl, mix together the cocoa powder, flour, baking powder and sugar, then add this to the chocolate, cherry and nut mixture. Stir together well. Beat the eggs and mix in until you have a silky consistency.

Pour your brownie mix into the baking tray, and place in the oven for around 25 minutes. You don’t want to overcook them so, unlike cakes, you don’t want a skewer to come out all clean. The brownies should be slightly springy on the outside but still gooey in the middle. Allow to cool in the tray, then carefully transfer to a large chopping board and cut into chunky squares. These make a fantastic dessert served with a dollop of crème fraîche mixed with some orange zest.

**note: i found that 360g of sugar is too much so i only used 50g. The sweetness is just right for those who are not too fond of sweetness.

Baked Rice

It's holiday today! Happy National Day!! ~
I was planning to make spaghetti today but i was too lazy to drive out to buy the ingredients so i decided to make this baked rice instead. The recipe is from HappyHomeBaking.

I was drooling at this dishes for a while now. So upon checking my fridge, i found out that i still have some cream left from the last cheesecake i made and left over rice from last night's dinner. However, i don't have mozarella cheese so i use cheddar cheese instead. The colour doesn't turn out to be as pretty as the dish made by HappyHomeBaking. But the taste is good.

I don't have fresh chicken stock so i used half a cube of chicken stock mix with about 1/2 cup of water. The rice doesn't turn out to be too wet or too dry. I like the texture just fine. =)


Below recipe is copied from from HappyHomeBaking.

**Thanks for sharing the wonderful recipe~

Ingredients:
(serves 4)

1.5 cups uncooked rice
2 chicken thigh
100g fresh mushrooms of your choice , sliced thickly
some minced garlic
1 cup cream (dairy)
1/2 cup chicken stock
1 teaspoon salt (adjust according to taste)
some black pepper
some grated mozzarella cheese
dried parsley

Method:

1. Wash and cook rice with rice cooker.

2. Bring a pot of water to the boil, put in the chicken thigh and boil till the chicken is almost cooked. Let cool and shred the chicken into bite sizes. Reserve half cup of the chicken stock.

3. Heat up a deep pan, with some cooking oil (or butter) stir fry minced garlic and mushrooms. Add in the shredded chicken meat. Add pepper and salt to taste. Continute to stir fry till the mushrooms become soft.

4. Add in the cream, stir well. Add in the chicken stock and bring to a boil. (Note, always add cream BEFORE the chicken stock, otherwise the mixture may not be smooth.)

5.Add in the cooked rice. Stir and let it cook for a few mins or until the sauce is almost fully absorbed by the rice.

6.Place rice into a heatproof baking dish. Cover top with grated cheese.

7.Bake in a pre-heated oven at 200 degC, till the cheese turns golden brown. Sprinkle with some dried parsley. Serve immediately.


Enjoy this wonderful dish~

Wednesday, December 30, 2009

Sausage Muffin


Recipes from Ching

All right, this is not a sweet dessert. I like the ingredients use here because it's not too much egg, not too much butter and sugar. Ideal for my super health conscious family. I personally like the fragrant of the black pepper. I would definitely make this again and with more black pepper.

Ingredients A:
5 sausages
1 tbsp butter

Ingredients B:
2 eggs
60 butter
60 caster sugar ( i used brown sugar)
1 tbsp of tomato sauces (you can use more if you like)
200g milk

Ingredients C:
250g flour
1 tbsp baking powder
1 tsp of black pepper (can be more if prefer)
1/4 tsp salt (omitted this if you use salted butter)
1 tbsp chopped basil leaves (optional)

Methods:
1. Melted butter in fying pan and stir fried sliced sausages until cook. Set aside.
2. Melted the butter in ingredients B over a double boiler.
3. Sieved flour together with baking powder and set aside.
4. Mix all the ingredients together in a big bowl and add in ingredients C
5. Fold in sausages.
6. Fill muffin cups up till 9/10 full
7. Bake in preheated oven in 170 degrees C for 15 -20 mins

This recipe make 7 small muffin cups

Enjoy~

Macao Sawdust Pudding (Serradura)


A super simple easy dessert to make!!!!

Recipes taken from Wendy
Thanks Wendy for sharing the recipe~

Ingredients:
250ml whipping cream
80g Maries biscuit or more
50g condensed milk
2 tsp of vanilla essence

Method:
1. Crush marie biscuits finely. Set aside
2. whip whipping cream till soft peaks. Add vanilla essence and condensed milk. Continue to beat the mixture until stiff peaks
3. Transfer the cream into a piping bag, fitted with 1 or 2 cm nozzle (i didn't use this, i just scooped them into the cup =p)
4. Place a layer of the biscuit crumbs at the bottom of your cups or moulds. Pipe a layer of cream on top. Layer with biscuits and cream again until cup is full.
5. Chill in the freezer for 2 hours. Take out the dessert and let it sit at room temperature about 10 minutes before serving.

Enjoy~

Patrina's Apple Crumble


This recipe is given by Patrina.
Had always wanted to bake an apple crumble but there are just too many recipes online. Which one is good? Patrina told me this recipe of hers is delicious and seeing how easy it is. I just have to try. =)

Patrina's original recipe use pre-made Apple fillings but since i don't have this in hand. I made myself. I did not cook the apple as some people would do because i prefer the fillings to have a bit of solidness when bitten into them, if you get what i mean.


Here's the ingredients:-

For the apple fillings:-
2 apples
1 tbsp of brown sugar (optional)
1 tsp of cinnamon powder/mixed spice (optional)

Crumbles:
1 cup flour
3/4 cup brown sugar (i reduced to 1/2, which i think is sweet enough)
1/3 oatmeal
1/4 cup butter (room temperature)
dash of cinnamon (optional)

Methods:-
1. Slices apples and toss them with sugar and cinnamon/mixed spice. Set aside
2. Place all the ingredients for Crumbles together and mix them up in a bowl.
3. Butter up a loaf dish
4. Put half the crumbles onto the dish. Layer with apple fillings. Then cover the apples with the rest of the crumbles.
5. Bake for about 50 mins to one hour until top is brown for 180 degrees C.

It's that easy. Cinnamon is optional. If you are the more adventurous type, the apples filling can be replace with Pears as well. xD

Enjoy this lovely dish~

Sunday, December 13, 2009

Cheddar Cheese Cake

Recipes from Ching

I used the wrong baking pan. So now the cake looks flat and short. Should have use the loaf pan.
The cake is still spongy though. Cutting was messy because my mom gave me a blunt knife which she thinks its enough for cutting. Sigh, cin cai la.

Hmm, the taste is not bad la. Not too cheesy since this recipe only use 3 pieces of cheese slices. So it's ideal for some who don't like cake which is too cheesy.

I messed up some of the step. Too kan cheong and failed to read the instruction before hand. haha. Good thing the cake still looks ok

I will probably try again with loaf pan ^^

Recipes (translated):
Ingredients A
3 slices of cheese
50g milk
50g butter

Ingredients B
3 egg whites
1/4 tsp of vinegar or cream of tartar
50g caster sugar

Ingredients C
50g flour
3 egg yolks

Methods:

1. double boil ingredients A till melted. Set aside
2. Beat egg white and cream of tartar until foamy. Add in half the caster sugars. Beat a while and then add in the rest of the sugar. Beat until stiff peak forms
3. Mix egg yolk into ingredients A (step 1)
4. Fold half of the egg white into the egg yolk mixture gently. Fold in sieved flour.
5. Fold in the rest of the egg white
6. Bake it in a water bath in a preheat oven at 140 degrees C.


Sunday, November 29, 2009

Spiral Curry Puff


Recipes from Florence

The below recipes are copy word for word from Florence's blog. For a more detail explanation with pictures, please visit her blog.

Ingredients: (16 pieces @ 9cm in diameter)
Water Dough:

210g plain flour
1/4 tsp salt
95ml warm water
25g lightly beaten egg
1 tbsp or 14g margarine

Oil Dough:
100g plain flour
60g - 70g margarine

Filling:
120g chicken thigh meat(cubed)
3 medium potatoes (cooked and cubed)
1 onion (cubed)
2 tbsp garam masala
1 tbsp chicken curry powder
salt and pepper to taste

Method:
1. Heat up some oil in the wok, stir fry the onions for a while, add in the diced chicken meat, diced potatoes and the rest of the seasonings. Stir fry till chicken is cooked. Leave aside to cool for use later.
2. Mix all ingredients for the water dough in a mixing bowl and knead till you have a soft and pliable dough. Leave aside to rest for 30 minutes.
3. After the water dough is rested for 30 minutes, mix everything for the oil dough till you get a workable dough.
4. Divide water dough into 2 pieces about 175g each. Divide oil dough into 2 pieces about 78g each. Work on one piece of water dough and one piece of oil dough. Keep the other pieces in a bag to retain moisture.
5. Wrap oil dough in water dough.
6. With sealed edges facing upwards, roll this into a flat long sheet.
7. Roll it up swiss-roll style.
8. Turn the dough 90 degrees and roll it into a thin rectangular flat sheet. Roll it up tightly in swiss-roll style again. Trim away the left and right edges to tidy it up.
9. Divide into 8 pieces and you will get this.
10. Flatten each piece into a round disc and wrap in the filling.
11. Fry the puff in medium heat and when they are about to be cooked, turn up the heat to force the oil out of the puff. Drained well and serve.
12. For the remaining dough, repeat steps (5) to (11).

And if you want to learn how to fold the curry puff like that, please visit this video at youtube. It's very easy. only took me 5 mins to learn = ]

Thanks Florence for sharing this nice recipe~

Pandan Raisin Cupcakes


Recipes from Ching

Ingredients:
100g Caster Sugar
100g Butter 100g
2 Eggs
120g Milk
1 tsp of Pandan essence
200g cake flour
2 tsp baking powder
50g raisins

Methods:-
1) Soak raisins in hot water for 30 mins. Mix milk and pandan essence together and set aside
2) Beat butter and sugar till light
3) Add in eggs slowly and beat well
4) fold in sifted flour (with baking powder) & milk mixture with spatula
5) fold in raisins. Fill paper cups
6) Bake in 170 degree celcius preheated oven for 20-25 mins

Makes 7 small cups, sized 5 cm x 5.5 cm
For a healthy option, i use brown sugar instead and it works fine =)
And i don't have cake flour.. so i use 1 3/4 cup of all purpose flour as replacement. haha
This cake is still soft and nice. Definitely a keeper.

Thanks a lot to Ching for sharing ^^

Related Posts Plugin for WordPress, Blogger...